Getting Started with Docker

What is Docker?
Docker is an open-source platform for developing, shipping, and running applications. It uses OS-level virtualization to create containers - lightweight, standalone packages that include everything an application needs to run: code, libraries, and dependencies. Containers isolate applications from the underlying system, ensuring consistency and portability across different environments.
Docker vs. Virtual Machines
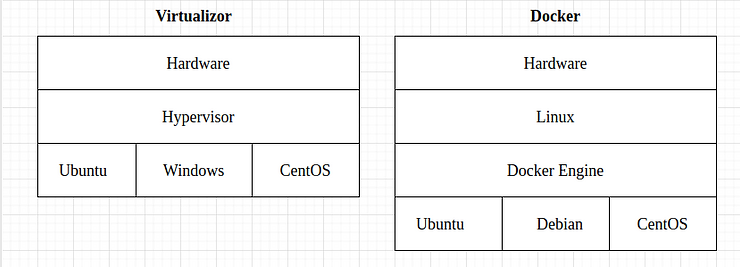
Traditional virtual machines create complete operating system environments, with each VM containing its own kernel, libraries, and applications. This approach requires significant host machine resources, including CPU, memory, and disk space. VMs are generally slower to start and stop, but they offer the flexibility to run any operating system regardless of the host system.
In contrast, Docker containers share the host machine's kernel and libraries, making them significantly lighter and more efficient. They can start up and shut down much faster than traditional VMs, leading to better resource utilization. However, Docker containers are tied to the underlying operating system, which means Windows containers cannot run on Linux systems or vice versa.
Installation on Linux
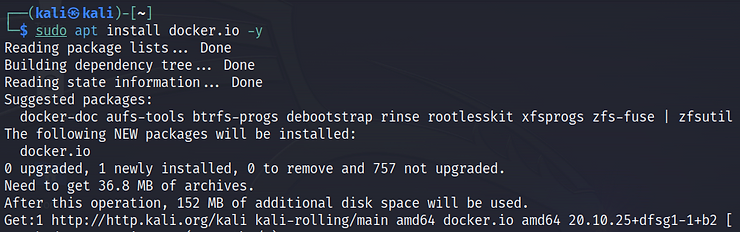
To install Docker on Debian-based Linux systems, run the following command:
sudo apt install docker.io -y
If Docker is not enabled or not active after installation, run the following commands:
sudo systemctl enable docker
sudo systemctl start docker
Working with Docker Images and Containers
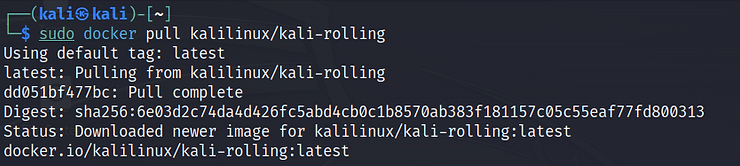
The process of working with Docker begins with pulling images from Docker Hub. For example, to get the Kali Linux image, you would use:
sudo docker pull kalilinux/kali-rolling
You can view your downloaded images using:
sudo docker images
To deploy a container, use the docker run command with appropriate flags. For instance,
sudo docker run -d -t --name kali kalilinux/kali-rolling
creates a detached container with an interactive terminal. The -d flag runs the container in the background, while -t attaches an interactive terminal. The --name flag allows you to assign a custom name to your container.
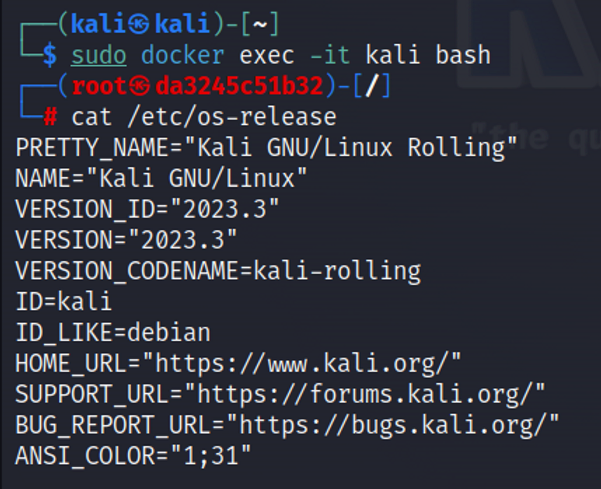
Once your container is running, you can access its shell using:
sudo docker exec -it kali bash
Docker Networking
Docker networking refers to the ability of containers to communicate with each other and other systems. In general, a container has no information about what kind of network it’s attached to. A container only sees a network interface with an IP address, a gateway, a routing table, DNS services, and other networking details.
Different Network Types
There are 7 different network types in Docker. Each of them has its own peculiarities. In this tutorial, we will briefly go through the first 4 of them because the others are a bit advanced topic that goes out of the scope.
- Bridge: The default network driver. Commonly used when your application runs in a container that needs to communicate with other containers on the same host. This type of network is used by default if you do not specify a driver when creating a container.
- User-Defined Bridge: Allows you to create your own custom networks with specific configurations. Those networks are valuable when you need precise control over container communication and network policies.
- Host: Remove network isolation between the container and docker host, and use the host’s networking directly.
- None: No network connectivity. Containers are completely isolated from both the host network and other containers.
- Overlay: Used for connecting containers across multiple docker hosts (machines). This is particularly useful for building distributed applications and services where containers on different hosts need to communicate seamlessly.
- Macvlan: Allows containers to have their own MAC addresses and appear as separate devices on the physical network. Each container gets its own unique network identity.
- Ipvlan: Gives users total control over both IPv4 and IPv6 addressing.
The Default Bridge
The default bridge network in Docker is a built-in, private network that allows containers to communicate with each other and with the host system. It is created automatically when Docker is installed and is the default mode when you run containers without specifying a custom network. The main advantages of this type of network are ease of use, automatic IP address assignment, container access to the Internet and name resolution (DNS).
We can view the newly created virtual network interface using the ifconfig command.

If you do not specify a network when creating a container, the bridge network will be assigned automatically. For example, let’s create a container with Ubuntu Linux. Command is simple.
kali> sudo docker run -dt — name <container_name> ubuntu

Now let’s check the availability of this container from the host and another container. To view the assigned IP address, launch the network inspector.
kali> sudo docker inspect bridge

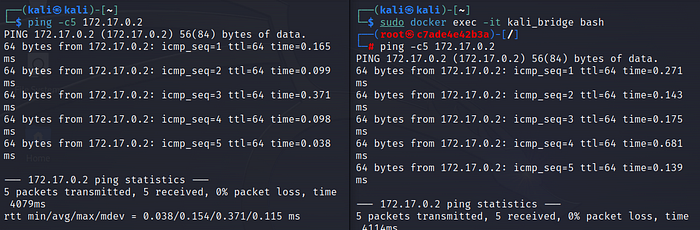
So, communication has been established. This network type is suitable for many use cases, especially when you want containers to talk to each other on the same host. However, for more complex scenarios or network isolation, you might consider creating your own custom bridge network (user-defined bridge).
User-Defined Bridge
A custom (user-defined) bridge in docker is a special network defined by the user. It allows you to implement private solutions for container communication similar to the default bridge network, but with more control and isolation. For example, you can specify the subnet range, IP address management, and other network options to suit the needs of your application. Also, containers on a user-defined bridge network can communicate with each other, but they are isolated from containers on the default bridge.
To create our network, simply run sudo docker network create command and the name of the network. In my case, it would be a bastion.

You can also customize the network by specifying additional options when creating it, such as the subnet range, gateway, and so on. But for now, I’m going to leave it by default and not specify any settings.
If we run ifconfig command again, we will notice a new virtual interface.
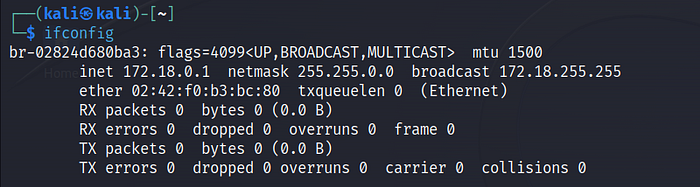
Now we can connect containers to this network by specifying the — network flag.
kali> sudo docker run -dt — name <container_name> — network <network_name> <image>

Now let’s check the availability of this container from the host and container from the default bridge network.

As you can see, the connection from the host is available, but from Kali, which is on a different docker network, is not.
The Host
When using host network mode, the container’s network stack is not isolated from the docker host (the container shares the host’s network namespace), and the container is not allocated its own IP address. In simple terms, it means that the container uses the same network configuration and network interfaces as the host operating system.
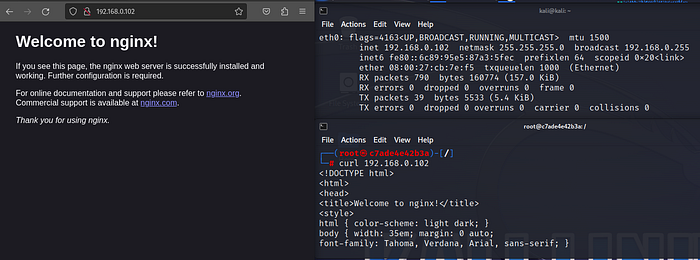
For better understanding, let’s create a container on this network with a Nginx web server.
kali> sudo docker run -dt — name — network host nginx
After inspecting the network, we can observe that no IP address is assigned to this container.

However, the server is accessible via the host IP from other containers and devices on this local network.
None Network
The name says it all. If you want to completely isolate the network stack of the container, you can use the — network none flag when starting the container.

If you try to check the IP address, you will see nothing but loopback.

Summary
Docker is becoming very popular among the hacker and cybersecurity industry due to the fact that it enables lightweight virtualization and comes with all the code, libraries and dependencies you need to run the application. This is one more tool in your toolbox that will help you along your path to becoming a cybersecurity expert!